BandLab to MP3: You’ve crafted your masterpiece in BandLab, and now you’re ready to share it with the world. But how do you get that studio-quality sound into a format everyone can enjoy? This guide breaks down the process of exporting your BandLab project as an MP3, covering everything from the basics of file formats to advanced techniques for maximizing audio quality.
We’ll explore the ins and outs of BandLab’s export options, delve into the world of MP3 encoding, and even touch on some pro tips for mastering your audio. Whether you’re a seasoned musician or a budding bedroom producer, this guide has you covered.
BandLab Overview
BandLab is a free, cloud-based digital audio workstation (DAW) that allows users to create, record, mix, and master music. It’s a comprehensive platform suitable for musicians, producers, and anyone interested in music creation. BandLab offers a user-friendly interface and a wide range of features, making it accessible to both beginners and experienced users.
Key Features and Functionalities
BandLab boasts a comprehensive set of features designed to streamline the music production process. Here are some of its key functionalities:
- Multi-track Recording:Record multiple instruments or vocals simultaneously, allowing for layered and complex arrangements.
- Virtual Instruments:Access a library of virtual instruments, including drums, synths, and bass, to enhance your tracks without the need for physical instruments.
- Audio Effects:Apply a variety of effects, such as reverb, delay, distortion, and equalization, to shape the sound of your tracks.
- Loops and Samples:Explore a vast collection of free loops and samples to add creative elements to your music.
- Collaboration Features:Share your projects with other users, collaborate on tracks, and receive feedback.
- Cloud Storage:Save your projects in the cloud, allowing you to access them from any device.
- Social Sharing:Easily share your music on social media platforms.
Target Audience
BandLab caters to a wide range of users, from aspiring musicians to seasoned professionals. Here are some of the target audiences:
- Beginners:The intuitive interface and comprehensive tutorials make BandLab an excellent starting point for those new to music production.
- Hobbyists:BandLab provides a fun and accessible way to explore music creation and experiment with different sounds.
- Students:It’s a valuable tool for music students to learn production techniques and develop their skills.
- Professional Musicians:BandLab can be used for creating demos, sketches, and even full-fledged productions.
Differentiation from Other Platforms, Bandlab to mp3
BandLab stands out from other music production platforms due to its unique features and advantages:
- Free and Accessible:Unlike many DAWs that require paid subscriptions, BandLab offers a free version with a comprehensive feature set.
- Cloud-based:This allows you to access your projects from any device with an internet connection, eliminating the need for local storage.
- User-friendly Interface:BandLab prioritizes simplicity and ease of use, making it approachable for users of all skill levels.
- Strong Collaboration Features:BandLab facilitates seamless collaboration with other musicians, fostering creativity and teamwork.
Exporting from BandLab
Once you’ve finished creating your music in BandLab, you can export it in various formats to share or use in other applications. This section Artikels the process and available options.
Steps Involved in Exporting
Exporting a BandLab project is straightforward and can be done in a few simple steps:
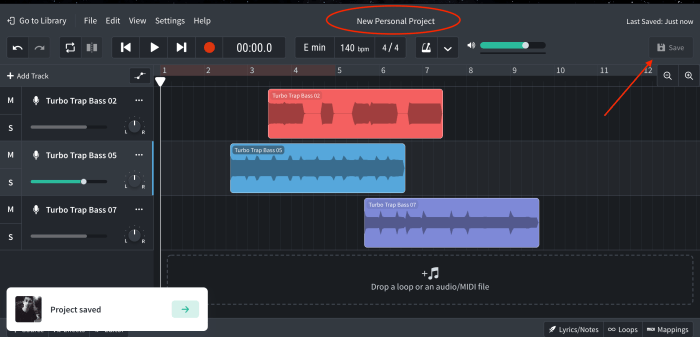
- Open your project:Navigate to the project you want to export.
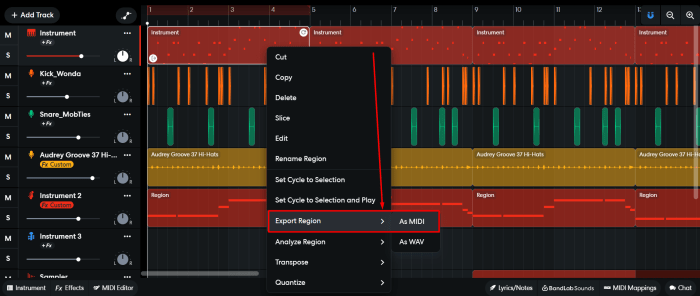
- Select “Export”:Click on the “Export” button, typically located in the top menu or toolbar.
- Choose export format:Select the desired export format from the available options (e.g., WAV, MP3, M4A).
- Set export settings:Depending on the chosen format, you may need to adjust settings such as bitrate, sample rate, and other parameters.
- Start export:Click on the “Export” button to begin the process.
- Save the file:Choose a location on your computer to save the exported file.
Export Formats

BandLab offers a variety of export formats to cater to different needs and applications. Here are some common options:
- WAV (Waveform Audio File Format):A lossless audio format that preserves the original sound quality. WAV files are typically larger in size but are ideal for professional audio production and archiving.
- MP3 (MPEG-1 Audio Layer III):A compressed audio format that reduces file size without sacrificing too much quality. MP3 is widely compatible and suitable for sharing and streaming.
- M4A (MPEG-4 Audio):Another compressed audio format, often associated with Apple devices. M4A can offer higher quality than MP3 at similar file sizes.
- Other Formats:BandLab may also support additional formats, such as AIFF, FLAC, and OGG, depending on the version and platform.
Quality and File Size Differences
The choice of export format significantly impacts the quality and file size of your audio. Here’s a breakdown of the differences:
| Format | Quality | File Size |
|---|---|---|
| WAV | Highest | Largest |
| M4A | High | Medium |
| MP3 | Medium | Smallest |
Lossless formats like WAV preserve the original sound quality but result in larger files. Compressed formats like MP3 and M4A reduce file size but may introduce some audio compression artifacts.
Converting to MP3
MP3 is a popular format for sharing and streaming music due to its balance between quality and file size. If you’ve exported your BandLab project in a different format, you can convert it to MP3 using various methods.
Purpose and Benefits of MP3 Conversion
Converting audio to MP3 format offers several benefits:
- Smaller File Size:MP3 compression reduces file size, making it easier to share and store audio files.
- Wide Compatibility:MP3 is supported by almost all audio players and devices.
- Streaming Compatibility:MP3 is a standard format for online music streaming services.
Step-by-Step Guide to MP3 Conversion
Here’s a step-by-step guide on how to convert a BandLab project to MP3 using different methods:
- Using Online Converters:
- Search for “MP3 converter online” and choose a reputable website.
- Upload your audio file (WAV, M4A, etc.).
- Select MP3 as the output format.
- Adjust MP3 settings (bitrate, sample rate) if needed.
- Click on the “Convert” button.
- Download the converted MP3 file.
- Using Desktop Software:
- Download and install MP3 conversion software (e.g., Audacity, Free Audio Converter).
- Open the software and import your audio file.
- Select “Export” or “Save As” and choose MP3 as the output format.
- Configure MP3 settings (bitrate, sample rate) as desired.
- Click on the “Export” or “Save” button to begin conversion.
- Using BandLab’s Built-in Export Feature:
- Open your BandLab project.
- Select “Export” from the menu or toolbar.
- Choose “MP3” as the export format.
- Adjust MP3 settings (bitrate, sample rate) if needed.
- Click on the “Export” button to start the conversion and save the MP3 file.
Comparison of MP3 Conversion Tools
Various online converters and desktop software are available for MP3 conversion. Each has its pros and cons:
| Tool Type | Pros | Cons |
|---|---|---|
| Online Converters | Easy to use, no installation required, often free | May have file size limitations, potential security risks |
| Desktop Software | More control over settings, often higher quality, better security | Requires installation, may be paid software |
| BandLab’s Built-in Export | Seamless integration with BandLab, convenient for users | Limited customization options compared to dedicated converters |
MP3 Quality and Settings

The quality of an MP3 file depends on several factors, including the bitrate and encoding settings used during conversion. Understanding these settings can help you achieve the optimal balance between quality and file size.
Bitrate and Audio Quality
Bitrate refers to the amount of data used to represent the audio signal in an MP3 file. Higher bitrates generally result in higher audio quality but larger file sizes. Lower bitrates compress the audio more, resulting in smaller files but potentially noticeable quality degradation.
MP3 Encoding Settings
MP3 encoding settings influence the compression process and impact the final audio quality and file size. Common settings include:
- Bitrate:As mentioned earlier, higher bitrates result in higher quality but larger files. Typical bitrates range from 128 kbps (low quality) to 320 kbps (high quality).
- Sample Rate:This determines the number of audio samples per second, influencing the frequency range and overall sound quality. Higher sample rates generally result in better quality but larger files.
- Encoder:Different MP3 encoders (software programs that convert audio to MP3) use different algorithms and may produce varying results in terms of quality and file size.
Optimal MP3 Settings
The optimal MP3 settings depend on your specific use case:
- Streaming:For online streaming, a bitrate of 128-192 kbps is often sufficient, as it provides a decent balance between quality and file size.
- Sharing:If you’re sharing music files with friends or family, a bitrate of 256-320 kbps is recommended for a higher quality listening experience.
- Archiving:For long-term archiving, it’s best to use a high bitrate (320 kbps or higher) to preserve the original sound quality as much as possible.
Advanced Techniques
Beyond basic MP3 conversion, several advanced techniques can enhance the audio quality and overall listening experience.
Mastering and Normalization
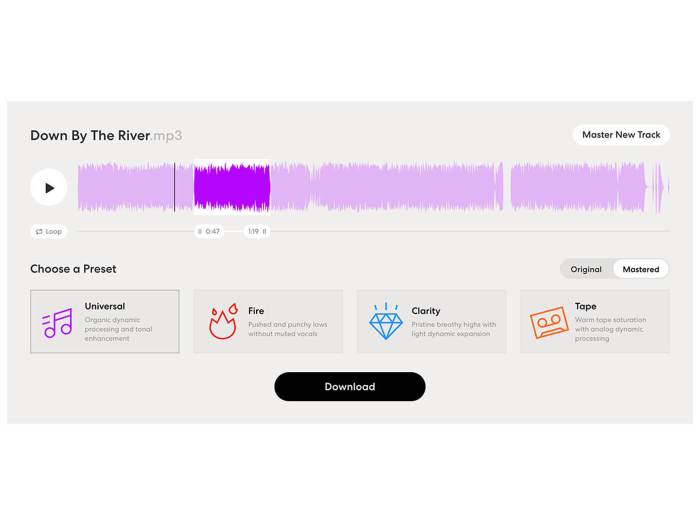
Mastering is a process that optimizes the overall loudness and dynamic range of a track, making it sound more professional and balanced. Normalization ensures consistent volume levels across different tracks or sections of a song.
Adding Metadata
Metadata refers to information about an MP3 file, such as the artist, title, album, and album art. Adding metadata helps organize and identify your music files.
Troubleshooting Common Issues

During MP3 conversion, you may encounter various issues. Here are some common problems and solutions:
- Audio Distortion:This may occur due to excessive compression or low bitrates. Try increasing the bitrate or using a higher quality encoder.
- File Corruption:Ensure that the conversion process is completed without interruptions. Use reliable conversion tools and check for errors.
- Missing Metadata:Use dedicated metadata editing software to add or modify information about your MP3 files.
Closing Notes
So there you have it – a comprehensive guide to getting your BandLab creations into MP3 format. By understanding the nuances of export settings and MP3 encoding, you can ensure your music sounds its best and reaches the widest possible audience.
Remember, the right tools and techniques can make all the difference in turning your digital creations into a sonic experience that truly shines.
FAQ Compilation: Bandlab To Mp3
What is the best bitrate for MP3s?
The ideal bitrate depends on your specific needs. For high-quality listening, aim for 320kbps. For streaming or sharing, 128kbps might suffice. Experiment to find the balance between file size and sound quality that works best for you.
Can I add metadata to my MP3s after exporting from BandLab?
Absolutely! Many audio editing software programs allow you to add metadata like artist, album title, and album art to your MP3s. Popular options include Audacity and Adobe Audition.
What if my MP3 sounds distorted or muffled after exporting?
This could be due to a low bitrate or improper encoding settings. Try experimenting with different bitrates and encoders. If the problem persists, check for clipping or excessive compression in your BandLab project.